Trigger Azure DevOps Pipeline from ReARM
N.B. This functinality is not part of ReARM Community Edition and is only available on ReARM Pro.
Azure Part
You would need to create Azure Service Principal to perform Azure DevOps trigger operations. For this, in Azure Portal search, search for
App registrations, click on it and once on theApp registrationspage, click on theNew registrationbutton.Choose a name for your Service Principal, opt for Single Tenancy - "Accounts in this organizational directory only" (default value) and click
Registeron the bottom.On the registered Service Principal page, note
Application (client) IDandDirectory (tenant) ID- you will need these values later in the ReARM configuration part.On the same page, under Client credentials click on the
Add a certificate or secret. Then click on theNew client secret. Enter desired secret description, i.e.ReARM Integration, choose desired expiration timeframe and clickAdd. On the next page, note created secret value - you will need it later.In Azure DevOps, in your git repository, create your desired pipeline by creating
azure-pipelines.ymlfile. The most basic hello-world pipeline may look as following:
stages:
- stage: Build
  jobs:
  - job: Build
    pool:
      vmImage: 'ubuntu-latest'
    steps:
    - script: echo "hello world"
Commiting an
azure-pipelines.ymlwould create a pipeline, open thePipelinesmenu in Azure DevOps to view it.From the
Pipelinesmenu, hover with mouse over pipeline name and note definition id as shown on the image below, alternatively, right click pipeline name and selectCopy link address, then paste the link somewhere and inspect definition id. You would need this definition id (or pipeline id) later in the ReARM configuration part.
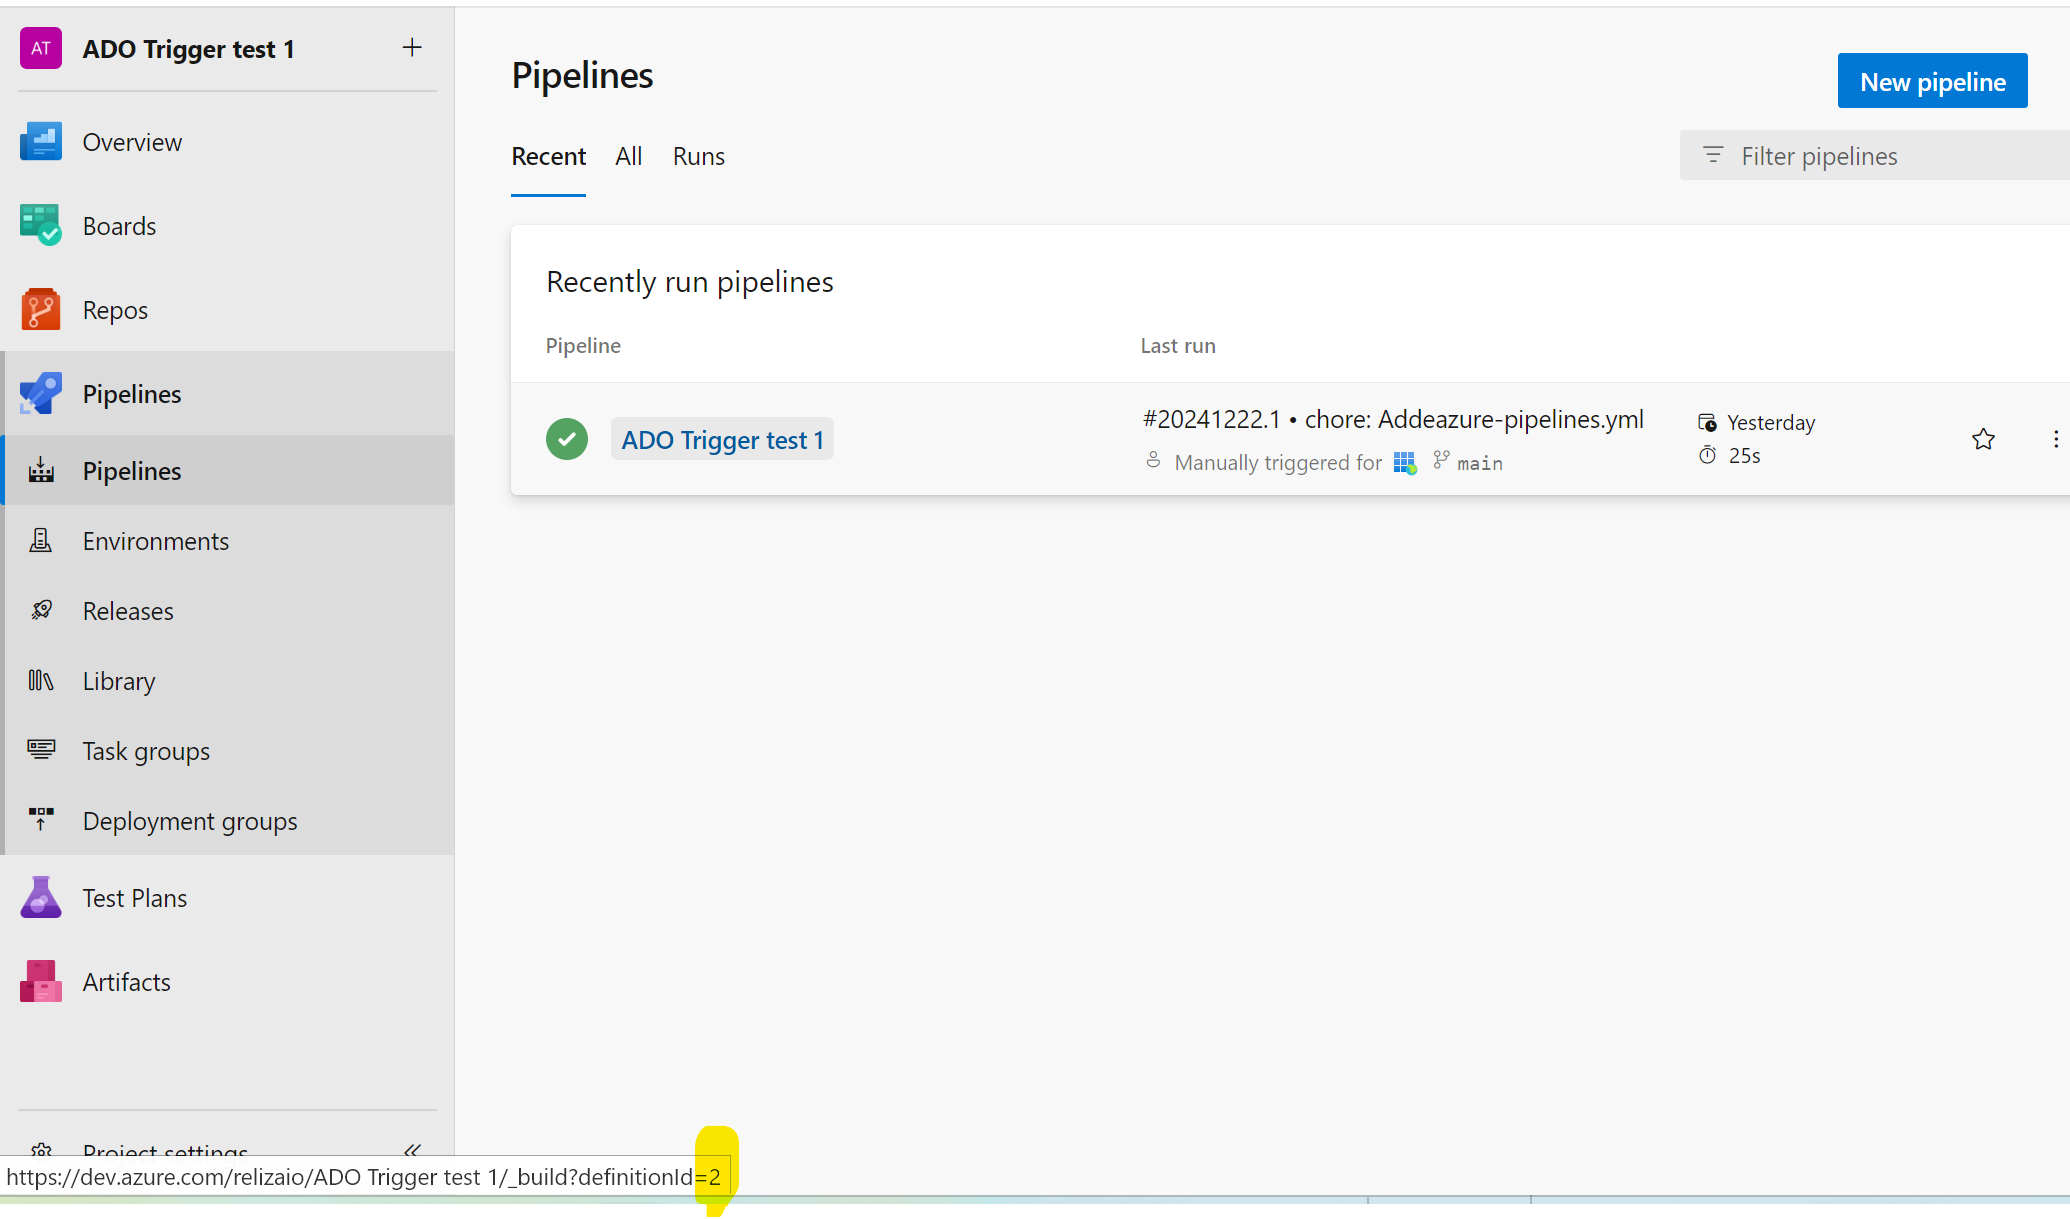
In the image above, the definition (pipeline) ID would be 2.
Also, in Azure DevOps, note your organization name and your project name. You would need both of these in the ReARM configuration steps.
In Azure DevOps, click on your organization name, click on the
Organization Settingsin the bottom left corner, click onPermissionsunder Security, then click on theProject Collection Build Service Accounts. Click onMembers, clickAddand search for the Service Principal you created above, click on it, then click onSave.
Note, that you may want to refine these permissions based on your organization policies. Setting Azure permissions may be quite complex, if you need to tune permissions, start with the base documentation here.
ReARM Part
Note that for integration triggers firing on approval policy events, you would need an Approval Policy configured; for firing on vulnerabilities or policy violations, you would need Dependency Track integration configured.
Organization-Wide CI Integration Part (requires Organization Admin permissions)
In ReARM, open Organization Settings menu. Under Integrations tab, in the
CI Integrationssub-section, click onAdd CI Integration.Enter description (try to make this descriptive as this will be used to identify integration).
Choose
Azure DevOpsas CI Type.Enter your App (client) Id noted above in the
Client IDfield.Enter your Client Secret noted above in the
Client Secretfield.Enter your Directory (tenant) Id noted above in the
Tenant IDfield.Enter your Azure DevOps Organization name noted above in the
Azure DevOps Organization Namefield.Click
Save. Your CI Integration is now created.
Component Part (requires User with Write permissions)
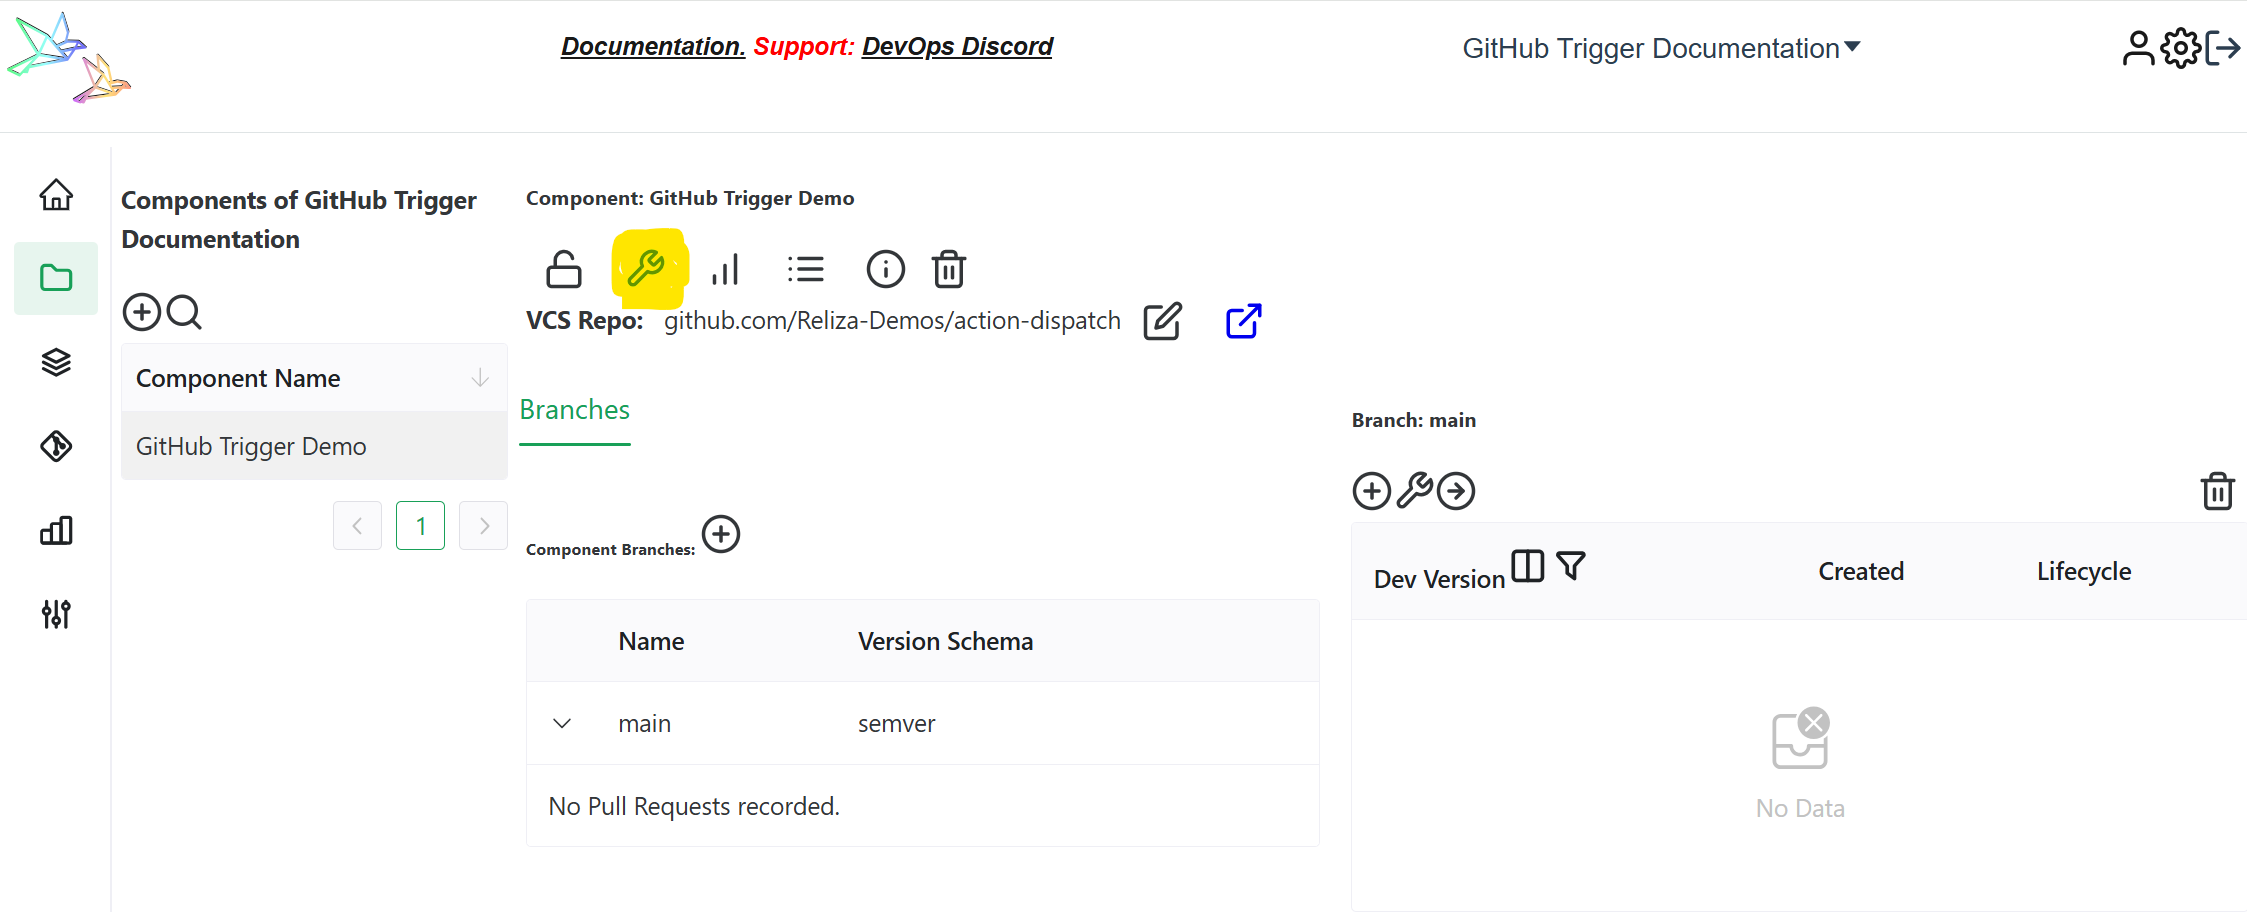
You need to set up a ReARM component that will have corresponding triggers configured. Once your component is created, open it and click on the tool icon to toggle component settings:
If you are setting triggers based on approvals, make sure you have Approval Policy selected under Core Settings tab.
Open Output Triggers tab and click on
Add Output Trigger.Enter name for your trigger, i.e.
Trigger Azure DevOps Pipeline.Select
External Integrationas Type.Choose your previously created Azure DevOps Integration in the
Choose CI Integrationfield.Enter your Azure DevOps Project Name as noted above in the
Azure DevOps Project Namefield.Enter your Azure DevOps Pipeline Definition ID as noted above in the
Pipeline Definition IDfield.If needed, enter Optional Parameters json values, that contain Azure variables and may be set as JSON and be distributed as
parametersin Azure call as described in Azure API documentation here.
In example, this may be set to
{"param1": "value1", "param2": "value2"}You may also use predefined variable $releaseversion to pass triggering release version, in example this can be:
{"myparam": "$releaseversion"}With sample pipeline may be looking as:
parameters:
  - name: myparam
    type: string
    default: myvaldefault

stages:
- stage: Build
  jobs:
  - job: Build
    pool:
      vmImage: 'ubuntu-latest'
    steps:
      - bash: echo ${{ parameters.myparam }}
Note that if using optional parameters, your pipeline must declare these parameters in the parameters block, otherwise runs will result in errors.
Click on 'Save', your trigger is now created.
Now create a Trigger Event linked to this trigger to make it fire on desired events (TODO - to be documented soon).